February 28, 2012

New Carpet: A Sneak Peek

While I work on uploading and editing the one million photos I took of our new carpet being installed, I figured I'd at least give you the satisfaction of seeing some of the final results. Then I'll back-track in some future blog posts to look at the purchase and installation process and the final Before and After pics.

Disclaimer 1: I took these pictures within 20 minutes of the carpet guys leaving Monday evening (and post a quick vacuuming session). So, the sun was setting causing a little darkness. Don't judge my poor photography skills.

Disclaimer 2: Wall-to-wall carpet is probably one of the least exciting design elements to show on the world wide web. But trust me, it makes a ginormous difference (in person) to the look and feel of our house. The house went from feeling like "under major renovation" to feeling like "renovation almost completed". I'm in happy land.

So, without further ado, please meet our new carpet in Bedroom #3 (first floor)...

This is literally the cushiest carpet EVER! I want to walk barefoot on it night and day and maybe even go camping on it with my sleeping bag.

Next up - Bedroom #2 (upstairs), which has the same carpet as Bedroom #3. This will be a future nursery/kids room. Since we're in the kid-making process (not to get too detailed here), the room is pretty much a blank slate for now. We did have our guest room furniture in here, but that is moving downstairs to Bedroom #3. Girl vs. Boy will someday determine how this room transforms.

Cushy Carpet = Happy Feet (isn't that a movie?)

Last on the list is the hallway and stairs carpeting. It is different carpet then we used in the bedrooms. This is the carpet that had my stomach in knots for 8 days. I had anxiety dreams about this carpet (no joke). Note to Self: Give your carpet fears over to God! Anyhoo… I finally slept well last night for the first time in 8 days after seeing the results.

Here’s a weird over-the-balcony type shot looking down at the stairs and landing. Ignore the fat, orange cat whose curiosity gets the best of him…

***feel free to oooh and aaaah with me just to make me feel better about my carpet choices - I need reinforcement here***

More to come on carpet, carpet, carpet with some detailed pics (hopefully in better lighting).

What d’ya think?

Pin It

February 27, 2012

Bedroom #3: It’s Nice to Meet You!

As I mentioned in last Wednesday’s post, we’ve been prepping the house for new carpet to go down in 2 bedrooms and the halls/stairs, but I don’t know that I’ve ever shown you the little bedroom on our 1st floor (aka Bedroom #3), which is one of the rooms scheduled to get new carpet. I’d like to take a minute introduce you now.

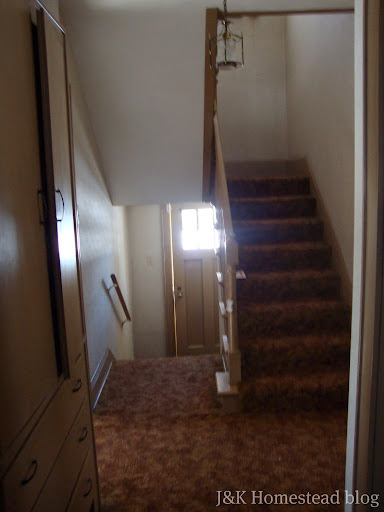
Bedroom #3 will become our guest bedroom. The room is about 10’ X 11’ and should be large enough for a bed and any other guest room basics we need. We only have 1 and 1/2 baths in the house. I hope it will be helpful that guests will have easy access to the 1/2 bath, which is at the end of the hall in the pic below (a cafĂ©’ door accessing the Dining Room is on the left). It’ll make midnight bathroom trips a bit easier, and they’ll have a little privacy while we are upstairs sleeping.

Here is a quick snap shot I took of this bedroom when we bought the house in 2010. Yes, it came complete with super dark wood trim, pink walls, a beat up hardwood floor, and an ugly fan/light fixture with weird objects hanging from the strings. I almost threw up when I saw it.

This room quickly became designated as the “move-in storage” room, full of items that had no permanent home or just simply weren’t needed immediately upon move-in.

And there this stuff sat. And sat. And sat. And sat ….

So, what was supposed to be a temporary storage facility, became more of a permanent storage facility. Yes, the room became more and more empty over the last year and a half as small items were relocated one-by-one to other rooms, but the room was still un-useable. You can see why I’ve hidden it from you for 20 months. Hee hee.

Then came the end of January 2012 when we were finally ready to pick out the carpet that would be laid in this bedroom. Suddenly, it became urgent that we empty Bedroom #3 and paint it BEFORE the carpet was laid. Good plan, right? We needed to paint the trim, doors, walls, and ceiling.

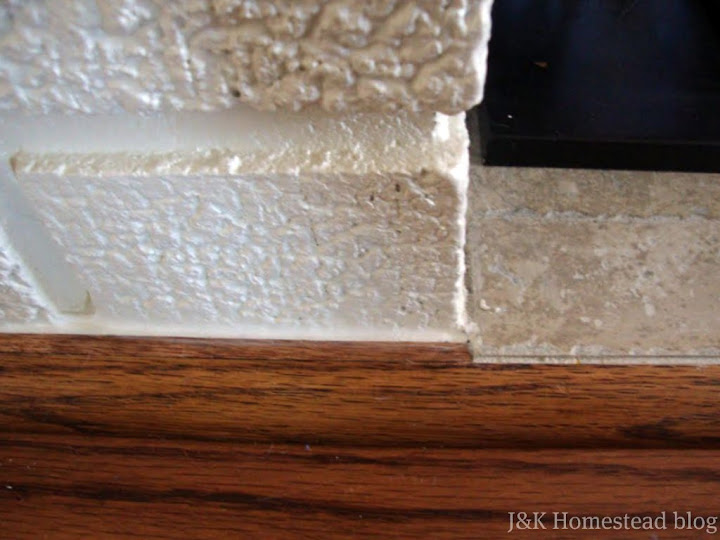
With major props to my dad who helped with all the trim painting, we got 3 coats around the windows and baseboards and 2 coats on all the doors.

We purposely did not paint the inside sash and grills of the windows because we’re planning to replace the windows later this year. So, no need to waste time/energy/money on painting them now.

3 coats of white paint covered the baseboards up nicely. The floor heating vent even got some coats of paint to help it blend in with the boards.

The closet door and entry door still need another coat of paint, but it’s a good start. It’s amazing what some white trim paint will do for a room. It’s so much brighter and even the pukey-pink paint on the walls didn’t look quite as bad anymore. Big difference to me.

In case you were wondering what trim paint we used, it’s Sherwin William's ProClassic paint in semi-gloss finish. We used this on the all the trim we painted in the whole house. It is an oil-based paint, which is NOT fun to work with, but it gets the job done right when painting un-painted wood.

Moving on to the next step after the trim was done … painting the walls. This is the fun (but tricky) part. I love picking out paint colors, but it can be overwhelming when there are so many options. I went to a local Ace Hardware store for some Benjamin Moore paint swatches, and I also picked up a few swatches at Lowe’s. I taped them up on the wall next to the door trim so that I could compare them and see them in different light settings (daylight and incandescent light at night).

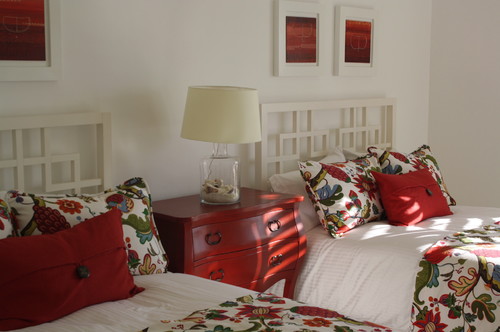
You can see I was going for a light, neutral color. Something that would be versatile yet fit with some of the bedding I knew I would be using in the bedroom. Some colors had more gray, some more brown, some a little yellow. In the end, I picked the swatch that is 2nd from the bottom – November Rain by Benjamin Moore.

The picture doesn’t do it justice. It is a hard-to-describe color though. A little taupe. A little gray. A little green tint to it. It’s the kind of color that though hard to define, goes with anything.

And here is the finished wall color which may help clarify things…

I love it! It’s the perfect neutral to me. I like the green tint it has because it makes it feel more like a “color” then just plain brown or gray. The only thing not painted yet is the closet. We kinda ran out of time. But we can do that after the carpet is down (we’re not carpeting the closet anyway). Then I can get it all organized like I want. Easy peasy.

Oh, and Joey put a couple coats of white paint on the ceiling before painting the walls. No need for ceiling pics. It’s just white after all.

Here’s a view from the hallway with the 1/2 bath on the left and bedroom #3 to the right…

And this is the mish-mash of flooring going on in the 3 areas. Hence, the bedroom and hallway will get new carpeting.

In fact, the new carpet is being installed as we speak. I’m so excited! There will be some before and after pictures posted this week along with all the deets. Stay tuned!

P.S. What do you think of the bedroom wall color?

Pin It

February 22, 2012

Prep Time for .... CARPETING!

Guess what? After 1.75 years of living in this house, we are FINALLY getting some carpet laid down in 2 of the bedrooms (excluding the Master Bedroom) and the upper and lower hallway and on the stairs. Can I get a Whoop, Whoop?!?!

We actually went carpet hunting on Monday night, found what we liked (and could afford)by the 2nd store, bought it, and it's being installed this coming Monday. More to come on the actual carpet selection. After all, this will likely be a multi-blog-post-event. Don't you love how you can create a new, big word by just combining a bunch of little words with hyphens? Anyhoo...

For today's post, I just want to start showing you the spaces as they are today. I'm including some "before" shots from when we first bought the house... Warning: they're kinda scary. I'll also be showing the most recent paint jobs that we completed (with the help of my parents) at the end of January.

So, here's the upstairs and downstairs hallways and the stairwell in all their "before" glory (these pics were likely taken with my phone as we toured the house)...


Dark, Dated, and Dingy is what immediately came to my mind.

So, after purchasing the house, we immediately began the heave-ho process of ripping it all out. Here's what it looked like after the horrific process of removing the 30 year old wallpaper...


Why were the walls underneath that wallpaper painted Pepto Bismol pink? Who knows! But I do know that covering them up in the awful wallpaper that existed was not the answer.

That's why we went to town and back painting. So, after much, much, much painting - we're talking 3-4 coats of white paint on the trim, cabinets, stair spindles (horrible) and part of the stair treads (and the final coat went on at the end of January) plus all the wall paint - we finally have a bright, lovely space with only the 2-toned stained disaster of of floor space left to finish...


The new carpet will fix that final problem. It will be such a change that I'm not even sure I'm ready for it. We've had ZERO carpet (other than area rugs) since we ripped out that brown/orange shag carpet when we moved into the house in 2010. But I'm looking forward to a little comfort under the feet and some texture to add interest. Plus, it will be a quieter space - believe it or not, going up and down wooden stairs in a wide open stairwell is loud.

Next up will be some photos of the 2 bedrooms that we'll be carpeting. The first floor bedroom (aka Bedroom #3) has been locked up with a key for most of the time we've lived here. In fact, I don't think I've EVER showed you the room on this blog. *GASP*


You'll soon find out why...

Pin It

February 16, 2012

Fireplace Shoe Install

I have a quick update for you on the finishing touches of our living room fireplace. In 2011, we replaced the tile on the hearth, painted the dirty, brown brick white, and painted the brass screen a dark oil-rubbed bronze (ORB). There was just one item remaining … the shoe molding to cover the gap where the brick and tile meets the wood floor.

You can see the bottom of the brick doesn’t sit right on the floor, but rather sits next to it causing a little gap. So, we couldn’t get a perfect paint line along the floor.

Meanwhile, the tile of the hearth actually sits about a half inch above the wood floor. So, the rough tile edge was visible on all 3 sides.

Joey bought the shoe molding in a natural wood grain and got a little bit of stain that closely matched the floors. He stained on the molding and then applied a couple layers of poly on top. He nailed the shoe to the floor and used a little matching wood putty to fill the nail holes.

It finishes the look off nicely doesn’t it? I thought it made an immediate difference. I love FINISHED projects!

Here is a close-up shot of where the tile meets the brick. The tile actually sticks out a hair past the brick. So, Joey had to make the inside of the molding narrower where it ran along the tile and wider where it ran along the brick. It worked well so that the outside edge of the molding was straight all the way around.

Same thing on the other side…

The molding looks like it’s just always been a part of the room since it matches the floor so well. Pretty nice!

And this is one item we can check off the 2012 to-do list!

Pin It

February 14, 2012

Spice It Up!


In honor of this lovey-dovey Hallmark inspired holiday, I thought we'd look at a few spunky rooms that bring some RED and PINK colors into the mix. Many people love to decorate in red, but I gotta say that the pink rooms are actually my fave. I fall for fuchsia every time!

The first 5 rooms incorporate RED, and the second 5 rooms incorporate PINK. I'm curious which ones you prefer ...

1. Red and lively bedroom in a beach house.


2. 1960’s era kitchen complete with a red island, custom patina copper vent hood, and farmhouse sink.


3. Greenfield Hill Residence - the fabric on those chairs is beautiful!


4. Nautical entry with red lantern pendant and sconces. I love the white table outlined in red paint.


5. Farmhouse mudroom by Sarah Richardson. I love the red closet doors and fun patterned curtains.


6. Gray & Pink Office/Craft Room. Love the colors!


7. Ladies Lounge - this Living Room is pretty with those pink patterned upholstered chairs.


8. Pink polk-a-dots are the way to go in a cute girl bedroom. Love the green ball-fringe euro pillows.


9. Candice Olson girly Living/Dining Room. I will always love this room - from its board and batten walls to its pink chandelier shades. Perfection.


10. Pretty in Pink stripes! Who wouldn't want to glam up in this hott space. Gray is the perfect accent color to ground all that pink.


Sources: 1. 2. 3. 4. 5. 6. 7. 8. 9. 10.
Pin It
Visit InfoServe for Blogger backgrounds.